
There have been a lot of guides and tutorials on setting up GitHub Pages, Ruby, Jekyll and the related gems needed for GitHub Pages. They’re all great. However, I ran into is simple yet frustrating installation issues. For one, installing the GitHub Pages gem did not mention if I need sudo or not, installing the Ruby using apt-get in Ubuntu/Debian yielded an old version, (1.9.3) as or writing. As someone that just wanted to get started with setting things up and exploring Ruby and Jeykll as a static-site generator, I couldn’t care less about versions (If it works, don’t fix it, right?). However, in this case, it doesn’t work. Gems from GitHub Pages need at least v2.0 up. I didn’t want to use a Ruby version Manager like rvm or vbenv, turns out that’s still the simplest way, and the few extra commands give a great return on investment in the future. The official ruby site did mention it’s an old and stable version from apt-get, but they didn’t mention we should grab a newer one. I can’t blame them I guess, since there’s so many web technologies that run happy on older versions of ruby.
This post serves to help first time users of GitHub Pages on how to set up a local environment that follows GitHub pages, so you can test out your sites locally before pushing that one commit that makes your experimentations live and for the whole world to see. If you’re wondering why we need another one of these tutorials, I decided to write one because I couldn’t find what I needed all in one place.
This guide is tailored for users on Ubuntu/Debian.
Here’s a rundown:
- Create your GitHub Pages.
- Set up Ruby on your system.
- Get all the gems using the github-pages gem bootstrap.
- Using Gems
- Running Jekyll.
Step 1:
This is simple, the tutorial supplied is really good. Nothing of much confusion.
Step 2:
This is where I spent an hour getting the wrong versions, installing directly to the /var/lib, and not being able to use gems.
The version of ruby supplied from apt-get was not sufficient to install Jekyll, simply doing sudo apt-get install ruby yielded a ‘lesser’ version of sorts. We needed a dev version with ruby-dev, then it turns out that was too old for github-pages. So let’s just go with using rvm.
What is RVM? Ruby Version Manager. RVM assists with installing multiple versions of Ruby in the local home directory so we don’t have to install a system-wide version in
/var/libsand mess around with sudo.
What you’ll want to do first is add a keyring to check the downloaded rvm (for that thing called security), it’s a prerequisite. After which we will download rvm and actually install it. These steps are taken directly from that website, if you’re from the future and these instructions don’t work, head there.
These steps also closely follow from: this tutorial (the first few steps at least, since that’s a guide for Ruby on Rails, which is different from what we want)
a. Open a terminal, you don’t need sudo for this. (In fact, only use sudo if I mention it explicitly)
gpg --keyserver hkp://keys.gnupg.net --recv-keys 409B6B1796C275462A1703113804BB82D39DC0E3
This is all in one line by the way.
b. Get the stable version of Ruby and RubyGems (Gems)
\curl -sSL https://get.rvm.io | bash -s stable --ruby
*That’s actually 2 commands rolled into one, we’re basically telling curl we want the stable version of RVM, and then also install ruby.
What happens after that is that RVM is downloaded, GPG key is verified, and it’ll do it’s thing like set up the right paths and so forth. You’ll also get a nice welcome message hoping that you’ll enjoy RVM. It’ll even grab the needed dependencies based on your version! I’m so spoilt by the simplicity of it all nowadays. Just sit back and let it install. In total it fetched about 25MB for my system.
After which RVM tells you that you need to run source /home/yourUserName/.rvm/scripts/rvm on all open shell windows.
For the sake of simplicity close all other shell/terminal windows and run source /home/yourUserName/.rvm/scripts/rvm (no quotes, of course).
If you did everything right, nothing will happen. (No news is good news, right?)
To be on the safe side, execute rvm requirements next so that rvm can check again for any dependencies it needs. You might need sudo, in my case I didn’t.
After that, we just need to dictate which version of ruby we want as default. Since ruby was already downloaded, just do:
rvm use ruby --default
Lastly, we need RubyGems, which is a ‘sophisticated package manager for Ruby’ as the help for gem announces. Chances are it’s already set up, but just to be on the safe side:
gem install current
Done.
To avoid having to run the source command every time ..
We need to add [[ -s "$HOME/.rvm/scripts/rvm" ]] && source "$HOME/.rvm/scripts/rvm" to the bashrc file.
This is done by giving your favorite text editor sudo priveledges and modifying ~/.bashrc.
If you have no idea what I just said.. open a terminal, type sudo nano ~/.bashrc, enter your password. You should see code. Go all the way to the end of the file, copy/paste or type that one liner right there. Save with CTRL-O and then `CTRL-X’ to close. Again, you will need sudo!
Credits to this SO post
Step 3:
This is simple. Just do gem install github-pages. Sit back and watch your computer do all the hard work. It could take a while. I got 51 gems at the end of it.
Step 4:
I’m adding this step because as a person that never used ruby before, I had this perception that using gems was something like running java classes or python scripts. (I actually Googled how to run gems). Turns out the issue I had was that the gems weren’t properly set up when I was using the older version of Ruby, so I felt like a monkey doing gem github-pages, sudo gem github-pages or ruby github-pages. All left me with command not found errors. The GitHub pages tutorial left me a little confused here.
Turns out all I had to do was github-pages in the terminal! (which I previously couldn’t because it didn’t set up correctly and in my haste did not notice the message telling me I didn’t do it right)
So all you need to do to “use gems” in the terminal is just to type the name of the gem, and whatever parameters you need.
(Try github-pages health-check, it told me I had no CNAME in current directory, which made sense because I don’t have a custom domain name at of writing.)
What are gems? A bundle of joy that contains code, documentations, and details of it’s origin/creator. For us we’ll use it like any other regular program in the bash terminal. See the official explanation on this for more info.
Step 5:
We pretty much have what we need set up, now we need to run it. I thought we can resume with the given tutorial, turns out I ran into more issues too.
Read on for instructions on overriding the _config.yml file, which I have yet to create when I first set things up. I also changed the code highlighter to rouge instead of the default pygmenter (this connects to the part where the Jekyll install guides suggested
Turns out you can’t change the default highlighter, I think. We’ll have to stick with these plugins supported (I really need to read up on this and will update accordingly. Hopefully.)
Run these commands as listed from the github-pages tutorial: (if you haven’t already, I didn’t do that at that time)
gem install bundler(this is needed to run update as well as keep our environment like GitHub’s)
*It also mentions that we should run bundle update occasionally to keep things up to date. So yeah, do that every now and then.
Go to your site’s repo (in the root directory) and create an empty file named Gemfile (no .txt or extensions!)
Add the following:
gem 'github-pages'
Install Node.js, with ‘sudo apt-get install nodejs’ without this I had errors from execjs, StackOverflow helped!
After which run bundle install (I tried doing this without the gemfile and got ‘Could not locate Gemfile or .bundle/ directory’ as a response)
Now run this in the root of your sites repo: bundle exec jekyll serve
And navigate to http://localhost:4000
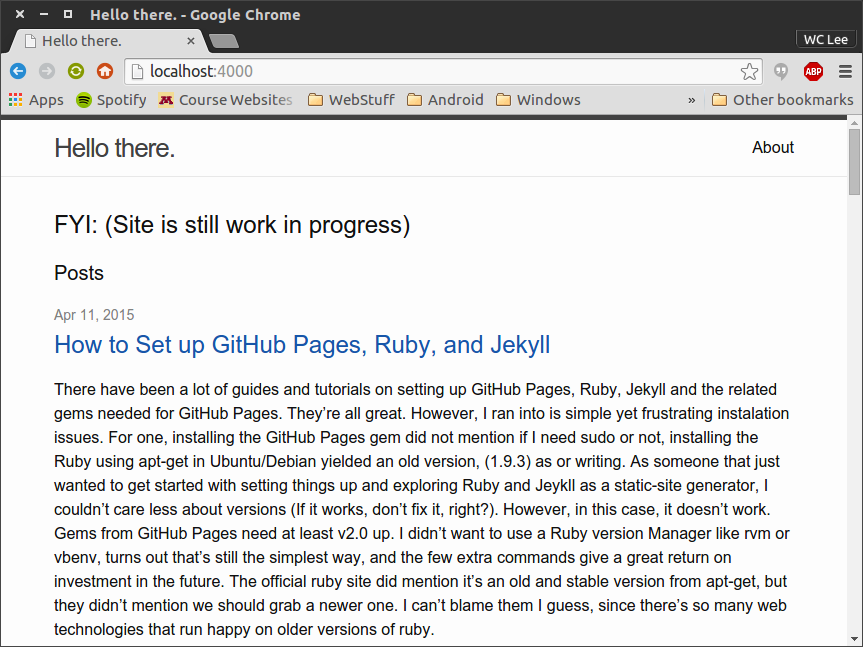
You should see that simple GitHub page you made, in my case it was a simple hello world (now it’s this post!). So much in the background for that!
Also you could copy and edit over files from the default Jekyll generated site template using the jekyll new my-awesome-site and then push that over to GitHub Pages, and then start off from there if you prefer, since without all that just having an index.html looked literally just like writing an index.html with nothing else (because that’s what it is).
Here’s how this blog originally (currently at time of writing) looks after adapting the default Jekyll template.
Also, for validating YAML files, you might find this site really useful: YAML Lint
We can continue with reading the basic documentation for Jekyll
Hope this helped!